

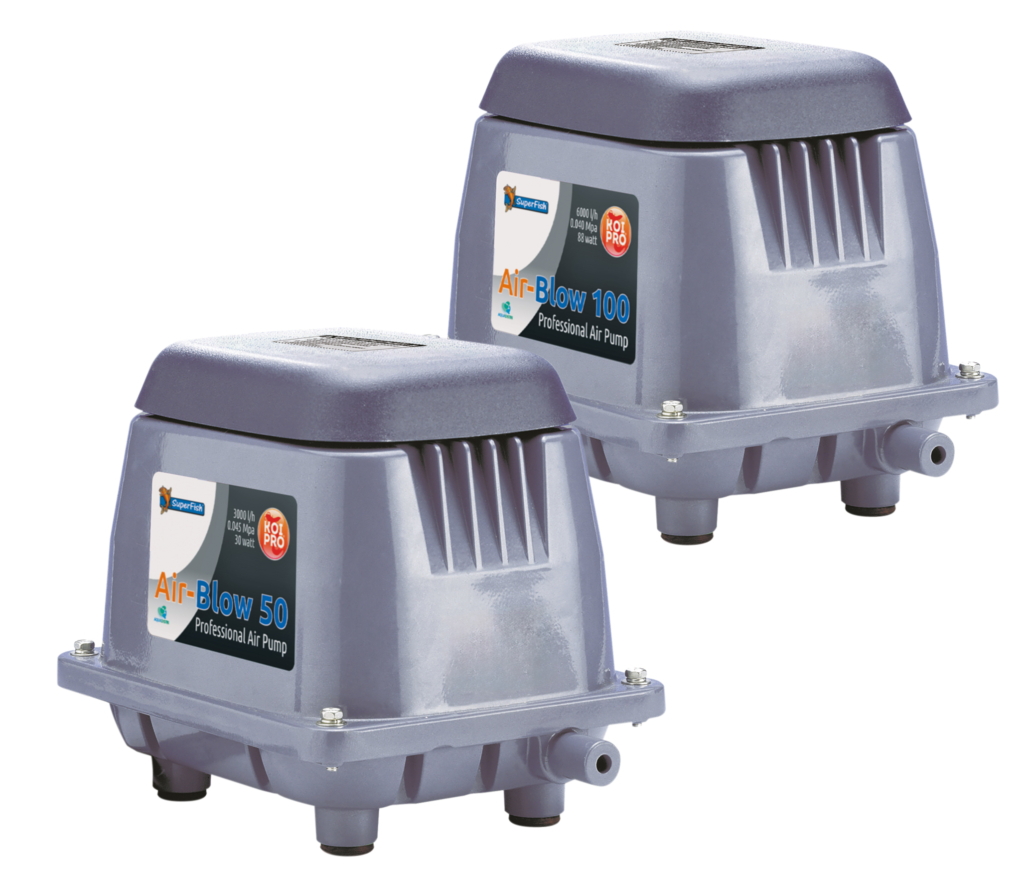
Air Blow 50 - 100
User manual
Function
The Air Blow air pump provides water movement in the pond, allowing oxygen and gas exchange to take place at the water surface. During the winter, an air pump can keep an existing ice hole open.
Installation
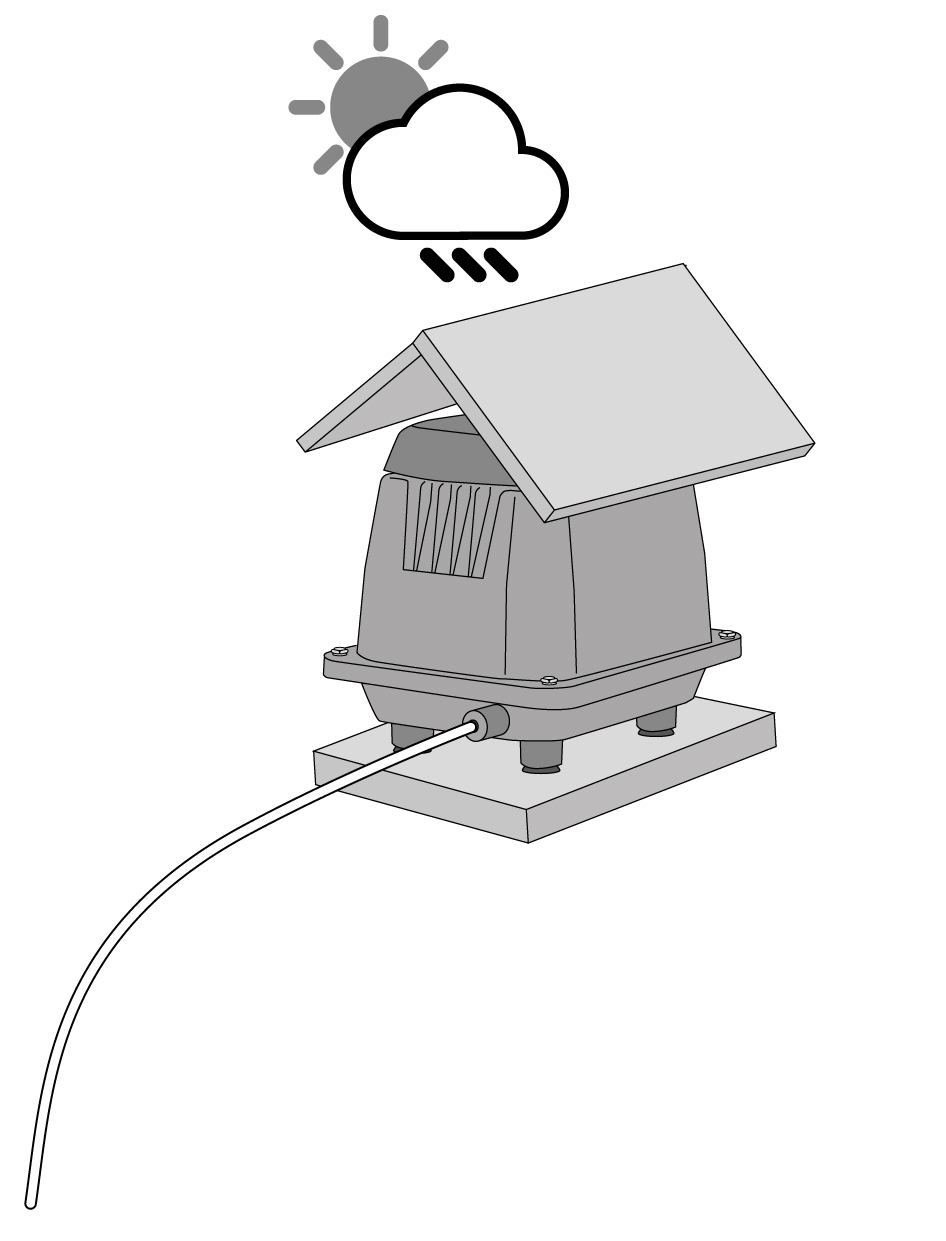
Place the air pump in a dry, moisture and dust-free place, protected from rain, splashing water and flooding.
Installation
Place the air pump in a dry, moisture and dust-free place, protected from rain, splashing water and flooding.
Place the air pump on a stable, level surface at least 2 metres away from the water.
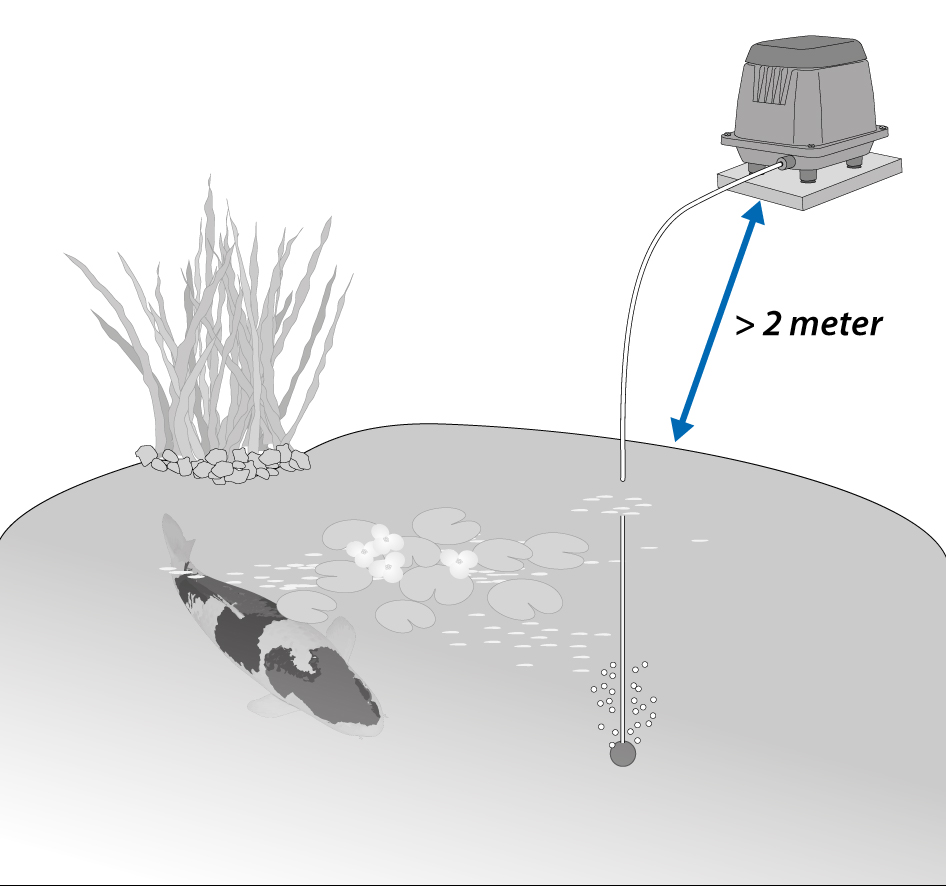
Place the air pump on a stable, level surface at least 2 metres away from the water.

Always position the air pump above the water level. Siphoning effect can cause water to run into the air pump and cause damage.
Water damage is not covered by the warranty!
- Connect the air hose with the air stone to the outlet of the air pump.
-
Place the air stone in the pond.
-
Turn the air pump on by putting the plug in the socket.

NOTICE! You can also place an air stone in your filter, it will improve the biological filtration and growth of beneficial bacteria.
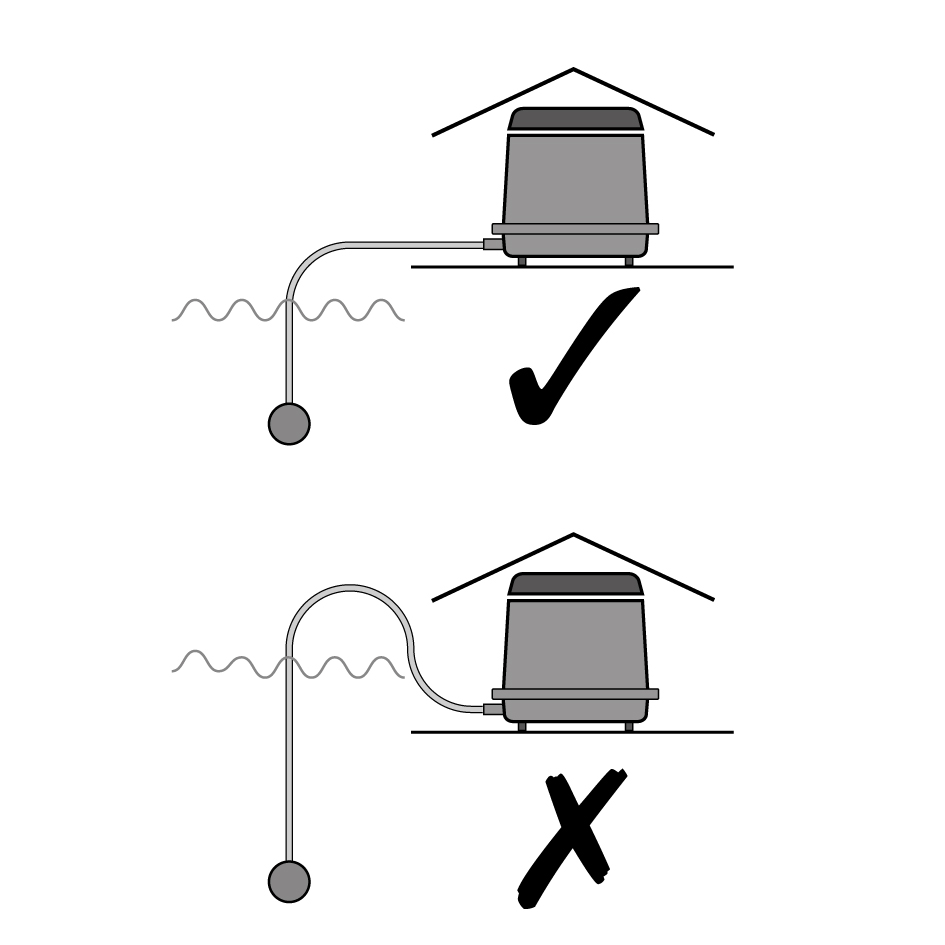
Always position the air pump above the water level. Siphoning effect can cause water to run into the air pump and cause damage.
Water damage is not covered by the warranty!
- Connect the air hose with the air stone to the outlet of the air pump.
-
Place the air stone in the pond.
-
Turn the air pump on by putting the plug in the socket.
NOTICE! You can also place an air stone in your filter, it will improve the biological filtration and growth of beneficial bacteria.
Maintenance
A decrease in air output, can be caused through kinked hosing or debris within the airstone. Alternatively, the valves in the air chambers or diaphragms may be worn and need to be replaced.
Wear of the valves and diaphragms is normal and is not covered by the warranty.
Koi Pro Air Blow Service Kits (2 membranes, 2 air chambers, 2 connecting hoses and 1 air filter) are available from your dealer.
Art. 0702045: Koi Pro Air Blow 50 Service Kit
Art. 0702075: Koi Pro Air Blow 100 Service Kit

Always Unplug the device from the power outlet before performing maintenance!
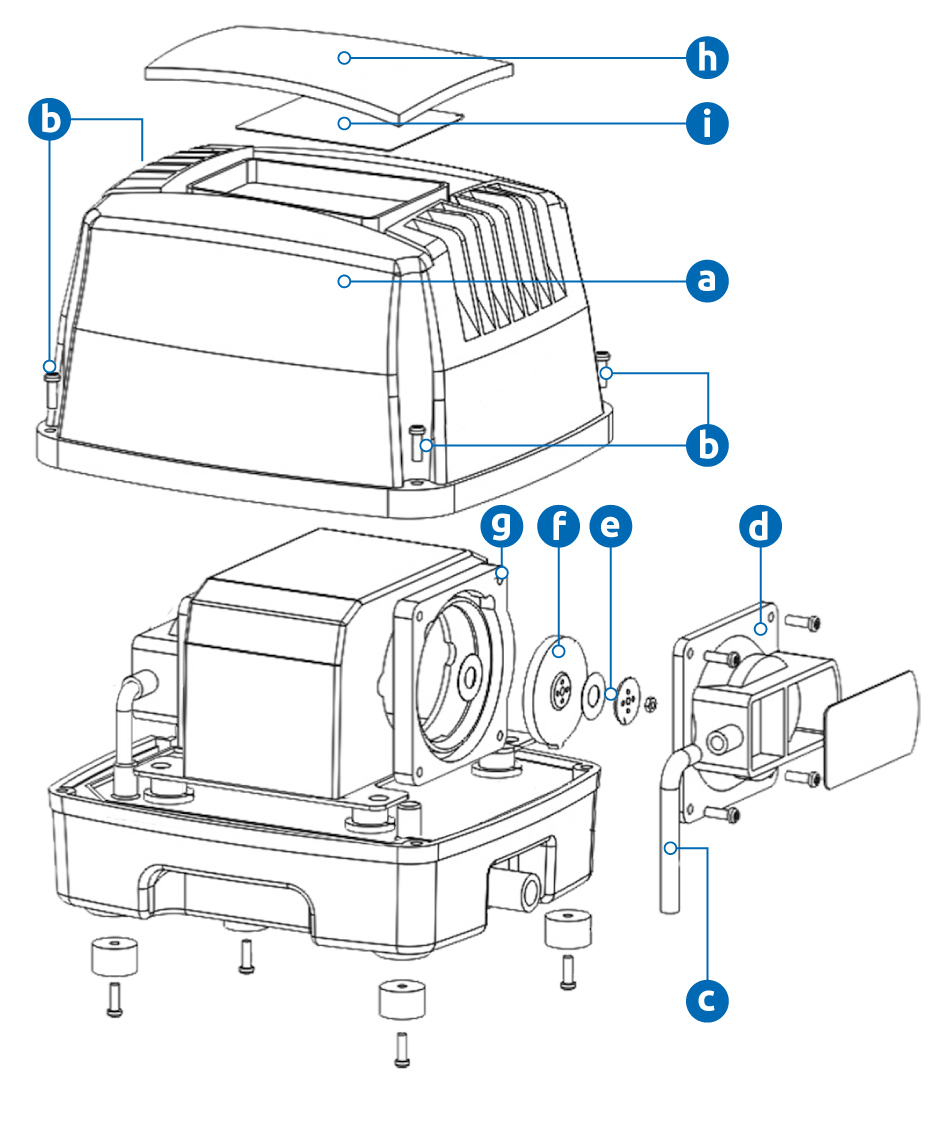
- Remove the hood (a) by first unscrewing the four screws (b) on the corners of the pump.
Note! Make sure to replace the diaphragms on both sides of the air pump at the same time. Neglecting this note make cause early breakage of the diaphragms!
-
Cut the tie wraps and remove the connecting hose (c), then unscrew the air chamber (d).
-
Use a wrench to remove the support disc with the cover plate (e), then remove the diaphragm case (g) from the housing.
-
Press the old diaphragm (f) out of the diaphragm case, then press the new diaphragm into the case, ensuring that the tab fits into its recess.
-
Refit the diaphragm case, then use the wrench to screw the support disc and cover plate (e) back into place.
-
Screw the new air chamber (d) into place and attach the new connecting hose (c), securing it with tie wraps.
Repeat these steps on the other side of the air pump!
Also check the inside of the air pump for dirt, moisture and rust.
-
Refit the hood and check that the air pump is working properly.
Always Unplug the device from the power outlet before performing maintenance!
- Remove the hood (a) by first unscrewing the four screws (b) on the corners of the pump.
Note! Make sure to replace the diaphragms on both sides of the air pump at the same time. Neglecting this note make cause early breakage of the diaphragms!
-
Cut the tie wraps and remove the connecting hose (c), then unscrew the air chamber (d).
-
Use a wrench to remove the support disc with the cover plate (e), then remove the diaphragm case (g) from the housing.
-
Press the old diaphragm (f) out of the diaphragm case, then press the new diaphragm into the case, ensuring that the tab fits into its recess.
-
Refit the diaphragm case, then use the wrench to screw the support disc and cover plate (e) back into place.
-
Screw the new air chamber (d) into place and attach the new connecting hose (c), securing it with tie wraps.
Repeat these steps on the other side of the air pump!
Also check the inside of the air pump for dirt, moisture and rust.
-
Refit the hood and check that the air pump is working properly.
Replacing the air filter.
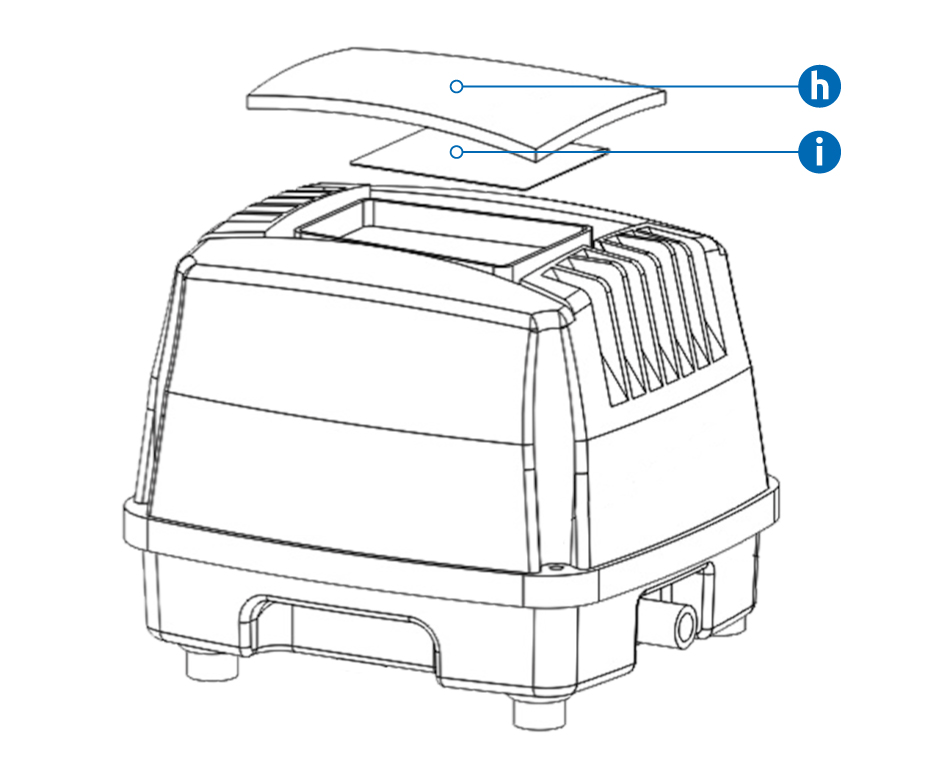
- Remove (pull) the air filter cover (h) on top of the hood.
- Replace the old air filter sponge (i) with a new sponge.
- Put the air filter cover back on to the hood.
Replace air tube and air stones yearly. Old and cracked ones will reduce performance and durability of the air pump.
Replacing the air filter.
- Remove (pull) the air filter cover (h) on top of the hood.
- Replace the old air filter sponge (i) with a new sponge.
- Put the air filter cover back on to the hood.
Replace air tube and air stones yearly. Old and cracked ones will reduce performance and durability of the air pump.
Technical specifications
| Model | Air Blow 50 | Air Blow 100 |
|---|---|---|
| Power | 30 watt | 88 watt |
| Output | 3000 l/h | 6000 l/h |
| Pressure | 0.045 MPa | 0.040 MPa |
| Size | 23 x 17 x 19 cm | 27 x 19 x 22 cm |