


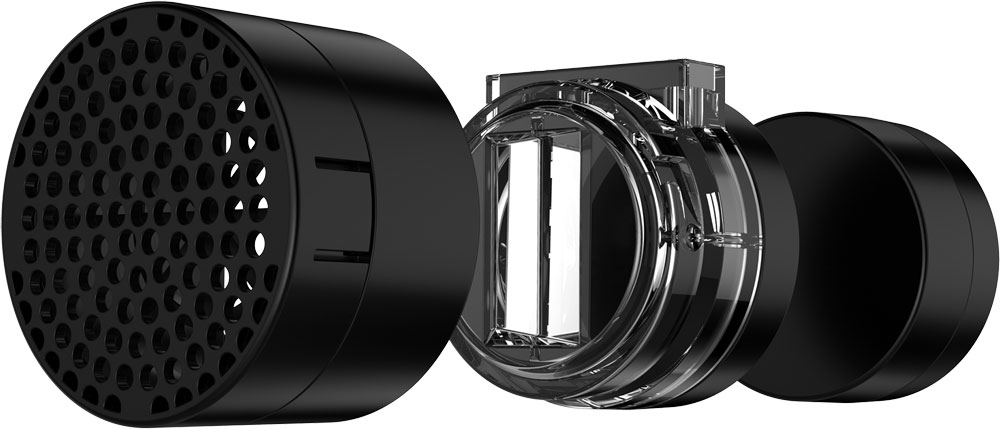
A.T.O.
User manual
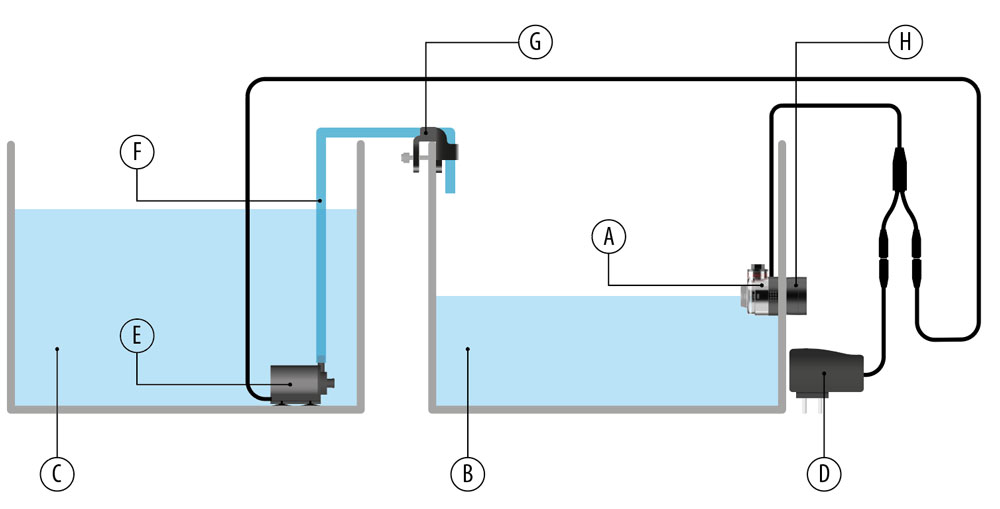
System connection
A
Optical sensor
B
Sump
C
Reservoir tank
D
Power supply
E
DC Pump
F
Hose
G
Hose holder
H
Magnetic connection
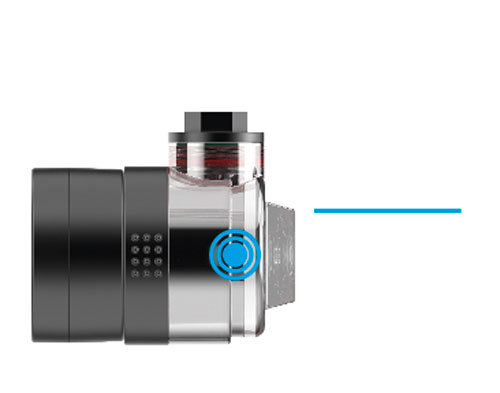
Indicator light
1
High water level Blue light.
1
Indicator light
1
1
High water level Blue light.
2
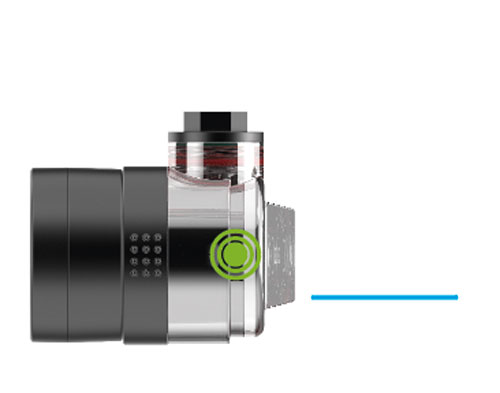
Normal to low water level green light.
2
2
2
Normal to low water level green light.
3
Low water level green light off.
3
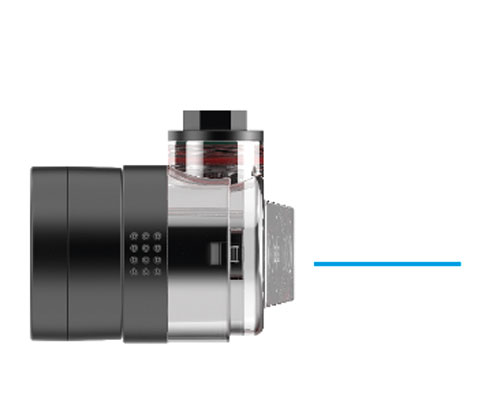
3
3
Low water level green light off.
4
Too low water level, red light alarm.
4
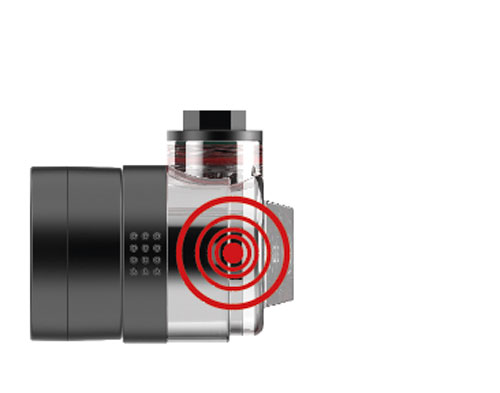
4
4
Too low water level, red light alarm.
Sensor installation
1
Setup
- Install the sensor (A) at the desired water level.
- Connect the sensor to the power supply (D) and the pump (E).
- Plug in the power supply and the device will automatically maintain the water level.
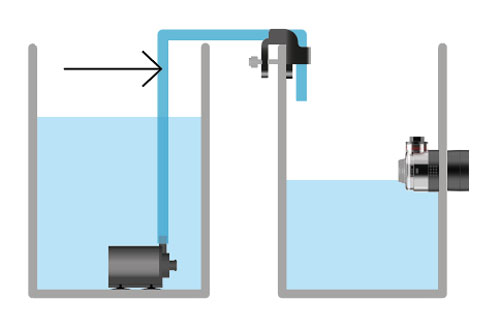
Sensor installation
1
Setup
- Install the sensor (A) at the desired water level.
- Connect the sensor to the power supply (D) and the pump (E).
- Plug in the power supply and the device will automatically maintain the water level.
The water outlet should not be aligned with the sensor! (Image 2)
Image 2
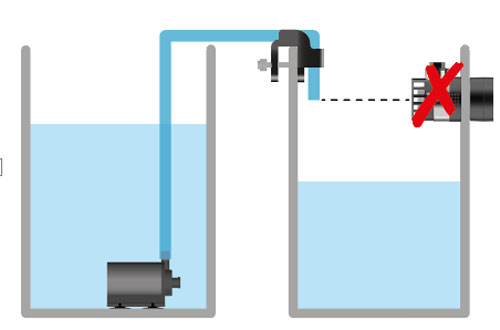
Image 2
The water outlet should not be aligned with the sensor! (Image 2)
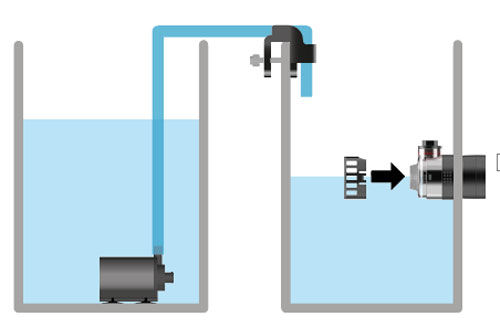
Anti-siphon prevention, if you stop the pump there is the risk of siphoning through the hose, make sure the hose is above the maximum water level in both the sump/tank as well as in the reservoir at all times. You can also make a small hole in the hose as an extra protection. (Image 3)
Image 3
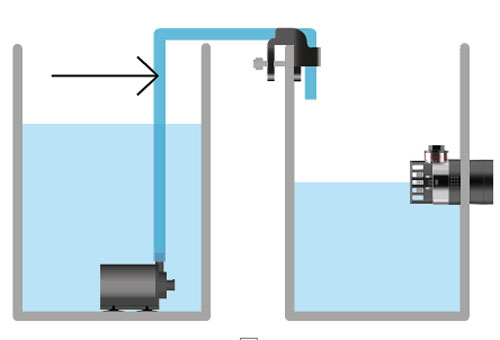
Image 3
Anti-siphon prevention, if you stop the pump there is the risk of siphoning through the hose, make sure the hose is above the maximum water level in both the sump/tank as well as in the reservoir at all times. You can also make a small hole in the hose as an extra protection. (Image 3)
2
Testing
To test correct operation, lift the sensor just a bit out of the water until the green led turns off. Now the system will automatically add water. Don’t forget to put the sensor back in the correct place.

2
Testing
To test correct operation, lift the sensor just a bit out of the water until the green led turns off. Now the system will automatically add water. Don’t forget to put the sensor back in the correct place.
3
Alarm and resetting
In the case of operational errors, such as water shortage in the water reservoir or if the water level can’t be maintained, the pump will stop after several attempts and alarm with a red flashing light.
To stop the alarm, unplug power supply, wait for 10 sec, re-plug and the device will resume normal operation.
Reset the system if you change the configuration of your installation, unplug power and re-start the setup process from step 1!
Maintenance:
1
Scale and salt settlement may influence proper functioning, regular cleaning is needed to ensure proper operation!
2
Disconnect power supply (D) and pump (E) from mains before any maintenance on the aquarium.
3
Open the pump (E) and remove rotor and axle, to clean them.
4
Clean sensors (A), impeller and shaft with 50% vinegar and 50% water solution. Let them soak for a minimum of 15 minutes.
5
Reassemble shaft and impeller. Verify that shaft caps are properly installed.
6
Reassemble pump (E) and place back in aquarium.
7
The pump (E) is a wearing part that depending on usage will need changing yearly, this is considered normal maintenance and not covered under warranty.
8
Replacement pumps (E), sensors (A) and power supply (D) are available at your dealer.
Technical data
| Maximum Flow | 280 L/h |
| Water height | 220 cm |
| Voltage | DC 12 V |
| Power | 4 Watt |
| Maximal glass thickness | 19 mm |
| Tube length | 2 m |