


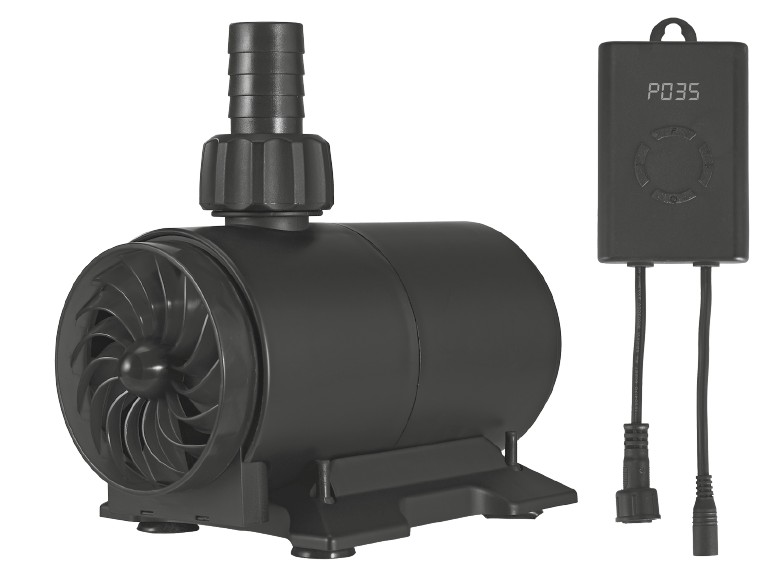
Eco Power 4000-6000-8000
User manual
Installation
- Connect the pump outlet to the filter system using an aquarium hose.
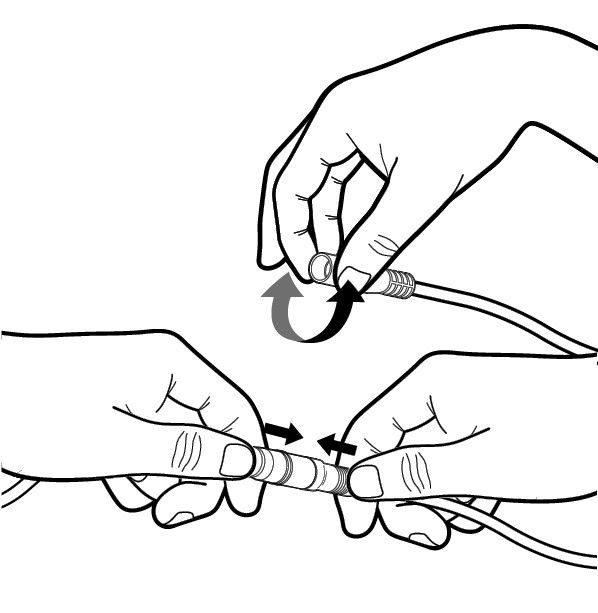
- Connect the left cable of the controller to the pump cable and tighten it with the lock nut (to make this easier, you can first soften the part that needs to go over the other plug between your fingers).
- Connect the right cable of the controller to the cable of the transformer. To ensure a secure connection, insert the two plugs completely into each other.
- Plug the transformer into the mains socket.
- The pump must always be completely submerged before it is put into operation.
- The controller is not waterproof. Water damage to the controller is not covered by the warranty.
Installation
- Connect the pump outlet to the filter system using an aquarium hose.
- Connect the left cable of the controller to the pump cable and tighten it with the lock nut (to make this easier, you can first soften the part that needs to go over the other plug between your fingers).
- Connect the right cable of the controller to the cable of the transformer. To ensure a secure connection, insert the two plugs completely into each other.
- Plug the transformer into the mains socket.
- The pump must always be completely submerged before it is put into operation.
- The controller is not waterproof. Water damage to the controller is not covered by the warranty.
Operation
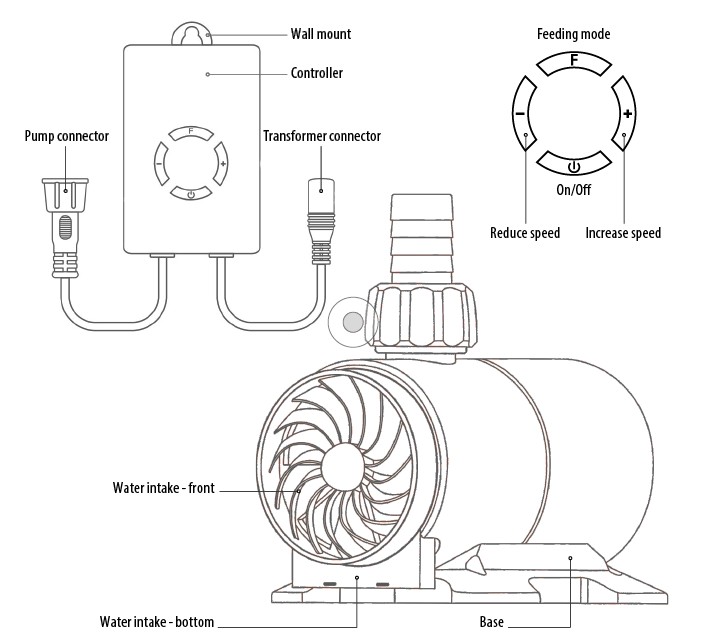
- Switch on the pump using the bottom button on the controller.
- Change the speed of the pump to adjust the flow using the + and – buttons. The pump has 10 speed settings (F-01, …, F-10). The controller first displays the selected setting (e.g. F-05) followed by the power consumption in watts (e.g. P035).
- Use the top F button to pause the pump for 10 minutes so that you can feed your fish without the food ending up in the filter. You can cancel the pause by pressing the F button again within 10 minutes and the pump will restart.
Water intake
The pump has a water intake at the front and at the bottom. By closing the blue grille at the front, only the intake at the bottom is used.
- Clean the pump monthly, depending on water and pollution conditions. Regular cleaning extents the lifetime of the pump.
- Remove the base by sliding it back.
- Turn the pump head clockwise and dismantle it.
- Remove the rotor from the pump and clean it. When replacing the rotor, ensure that both pins on the rotor housing are inserted into the openings in the black cover plate and click the assembly shut.
- Check that the rotor is running smoothly before refitting the pump head. If this is not the case, adjust it.
- Clean the chamber inside with the brush;
- Clean the surfaces of the magnet and the impeller;
- Clean the shaft, bearing and other space parts inside.
Operation
- Switch on the pump using the bottom button on the controller.
- Change the speed of the pump to adjust the flow using the + and – buttons. The pump has 10 speed settings (F-01, …, F-10). The controller first displays the selected setting (e.g. F-05) followed by the power consumption in watts (e.g. P035).
- Use the top F button to pause the pump for 10 minutes so that you can feed your fish without the food ending up in the filter. You can cancel the pause by pressing the F button again within 10 minutes and the pump will restart.
Water intake
The pump has a water intake at the front and at the bottom. By closing the blue grille at the front, only the intake at the bottom is used.
- Clean the pump monthly, depending on water and pollution conditions. Regular cleaning extents the lifetime of the pump.
- Remove the base by sliding it back.
- Turn the pump head clockwise and dismantle it.
- Remove the rotor from the pump and clean it. When replacing the rotor, ensure that both pins on the rotor housing are inserted into the openings in the black cover plate and click the assembly shut.
- Check that the rotor is running smoothly before refitting the pump head. If this is not the case, adjust it.
- Clean the chamber inside with the brush;
- Clean the surfaces of the magnet and the impeller;
- Clean the shaft, bearing and other space parts inside.
Troubleshooting
- In the event of a malfunction, an error code will appear on the controller. Switch off the pump, unplug it from the mains and check the pump.
- Error code E1: The pump has stopped pumping due to excessive input voltage (normally 24 volts). Switch off the pump, unplug the transformer from the mains and wait 5 minutes. Plug the transformer back into the mains and switch the pump back on. If the error message persists, replace the transformer.
- Error code E2: The pump has stopped pumping due to an input voltage that is too low. Switch off the pump, unplug the transformer from the mains and wait 5 minutes. Plug the transformer back into the mains and switch the pump back on. If the error message persists, replace the transformer.
- Error code E3: The pump has stopped pumping because the power is higher than 1.5 times the nominal power. Switch off the pump and unplug the transformer from the mains. Clean the pump and also check the hose for any blockages. Switch everything back on. If the error message persists, consult your dealer.
- Error code E4: If the pump pumps without water for more than 1 minute, the Dry Run Protection will start. The pump will switch on for 10 seconds and off for 10 seconds five times. After the fifth time, the pump will stop working completely. You must first unplug the pump and resolve the water shortage. You can then plug the pump back in, after which it will start up normally again.
- Error code E5: If the rotor or motor is blocked, the pump will switch on for 3 seconds and off for 3 seconds 5 times, and then stop working completely. Unplug the pump, remove the rotor and clean or replace it.
- Error code E7: There is a connection problem. The pump will turn on for 3 seconds and off for 3 seconds five times, and then stop working completely. Check the connections.