
Pond Multi Vac
User manual
Function
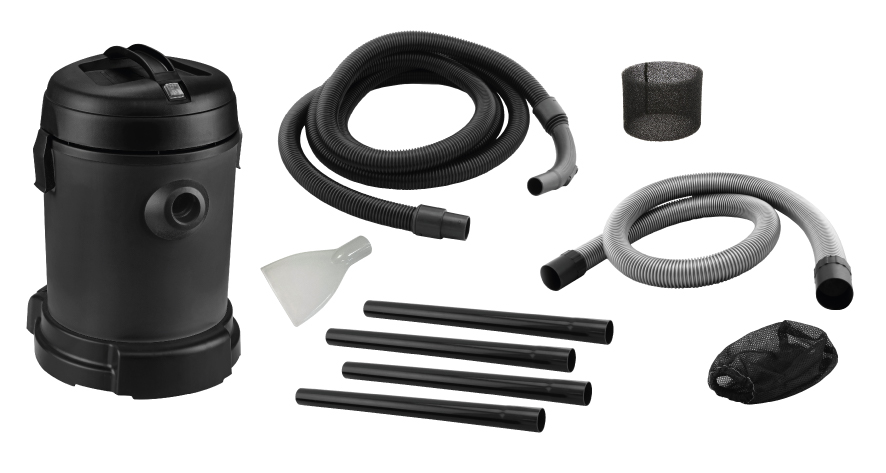
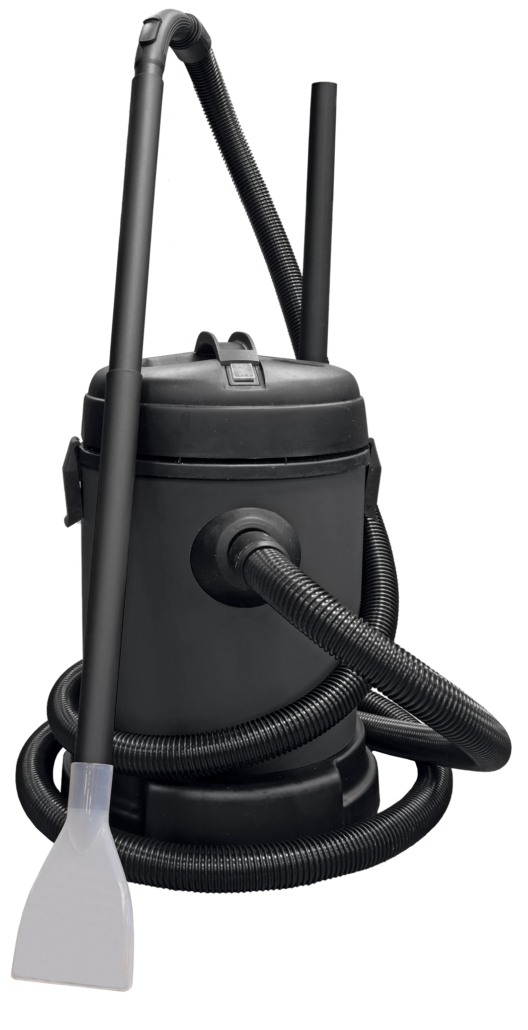
Multi-functional pond vacuum cleaner with two modes, one for pond cleaning and one for vacuuming.
For removing sludge and dirt from the pond, an interval suction is used, the dirt is vacuumed up together with the pond water (is also a water change). The water drains away via the discharge hose, which you can use to water the plants. The sludge, which you can use as organic fertiliser, is collected in the dirt collection bag.
Constant suction is used for vacuuming dirt around the house and in the garden. This requires a dust filter (Art. 06090030), which is not included.
Using the Pond Multi Vac as a pond cleaner
To use the SuperFish Pond Multi Vac as a pond cleaner, install the following accessories.
- Remove the motor housing (top) by opening both clamps (c) and lifting the motor housing from the container.
- Check that the filter sponge (a) is around the lower part of the motor housing. If this is not the case, insert the filter sponge (a) around lower part of the motor housing and secure it with the elastic band.
- Place the motor housing (b) on the container and secure it with the two clamps (c).
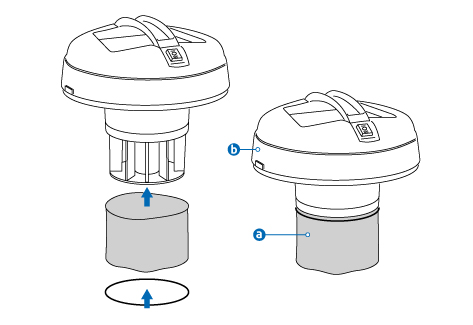
- Remove the motor housing (top) by opening both clamps (c) and lifting the motor housing from the container.
- Check that the filter sponge (a) is around the lower part of the motor housing. If this is not the case, insert the filter sponge (a) around lower part of the motor housing and secure it with the elastic band.
- Place the motor housing (b) on the container and secure it with the two clamps (c).
- The discharge hose has one end with a rubber shut-off valve and one open end. Insert the open end of the discharge hose (d) into the outlet of the container (bottom/rear).
- Put the dirt collection bag (i) around the other end (with shut-off valve) of the discharge hose.
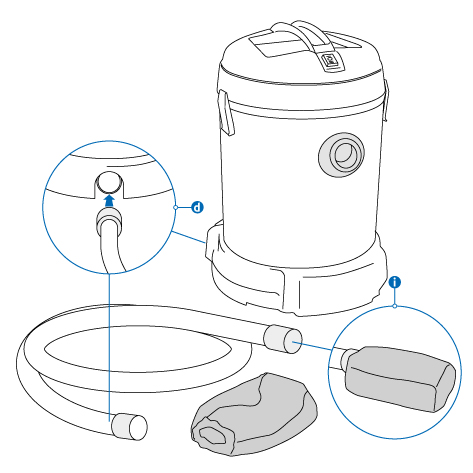
- The discharge hose has one end with a rubber shut-off valve and one open end. Insert the open end of the discharge hose (d) into the outlet of the container (bottom/rear).
- Put the dirt collection bag (i) around the other end (with shut-off valve) of the discharge hose.
- Insert the suction hose (e), with the little catch pointing upwards, into the inlet of the container and turn it a quarter turn so that it locks in place.
- Insert the handle of the suction hose (f) into a suction tube. Insert the suction tubes together to the desired length (42/78/114/150 cm).
- Insert the suction tube into the transparent nozzle (g)
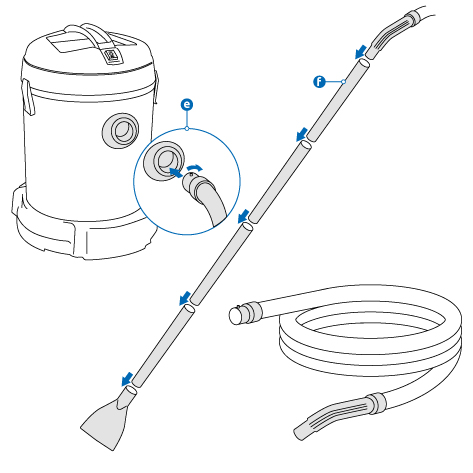
- Insert the suction hose (e), with the little catch pointing upwards, into the inlet of the container and turn it a quarter turn so that it locks in place.
- Insert the handle of the suction hose (f) into a suction tube. Insert the suction tubes together to the desired length (42/78/114/150 cm).
- Insert the suction tube into the transparent nozzle (g)
- Plug into the mains socket.
- You can now take the Pond Multi Vac into operation by pressing the tilt switch to position II.
- The Pond Multi Vac will now start suctioning. Every time the container is full of water, it will automatically turn off to allow the dirty water to drain away via the drain hose and then start to suction again (Interval).

NOTICE! Always drain the dirty water from the container after use, the container is not intended for storing liquids.
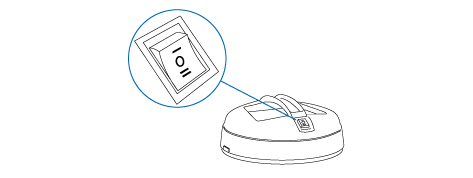
- Plug into the mains socket.
- You can now take the Pond Multi Vac into operation by pressing the tilt switch to position II.
- The Pond Multi Vac will now start suctioning. Every time the container is full of water, it will automatically turn off to allow the dirty water to drain away via the drain hose and then start to suction again (Interval).
NOTICE! Always drain the dirty water from the container after use, the container is not intended for storing liquids.
Using the Pond Multi Vac as a vacuum cleaner
To use the SuperFish Pond Multi Vac as a vacuum cleaner, install the following accessories.
NOTICE! To use the Pond Multi Vac as a vacuum cleaner, you will need a dust filter (j) (Art. 06090030 – SuperFish Pond Multi Vac Dust Filter), this is not supplied as standard and should be purchased separately. Do not use the Pond Multi Vac as a vacuum cleaner without fitting the dust filter.
- Remove the motor housing (top) by opening both clamps (c) and lifting the motor housing from the container.
- First place the dust filter (j) in the container, with the top edge of the dust filter completely sealing the container.
- Place the motor housing (b) on the container and secure it with the two clamps (c).
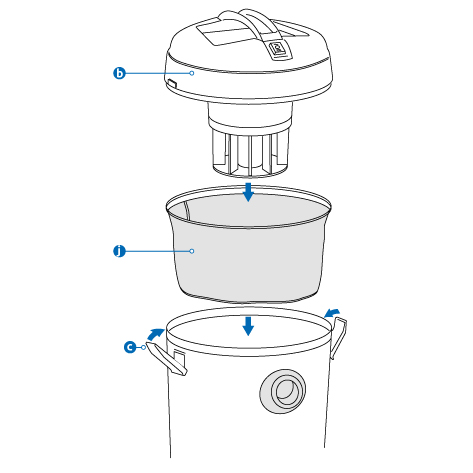
NOTICE! To use the Pond Multi Vac as a vacuum cleaner, you will need a dust filter (j) (Art. 06090030 – SuperFish Pond Multi Vac Dust Filter), this is not supplied as standard and should be purchased separately. Do not use the Pond Multi Vac as a vacuum cleaner without fitting the dust filter.
- Remove the motor housing (top) by opening both clamps (c) and lifting the motor housing from the container.
- First place the dust filter (j) in the container, with the top edge of the dust filter completely sealing the container.
- Place the motor housing (b) on the container and secure it with the two clamps (c).
Insert the sealing cap (k) into the outlet of the container (bottom/rear).
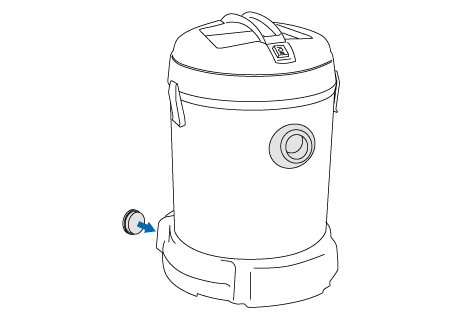
Insert the sealing cap (k) into the outlet of the container (bottom/rear).
- Insert the suction hose (e), with the little catch pointing upwards, into the inlet of the container and turn it a quarter turn so that it locks in place.
- Insert the handle of the suction hose (f) into a suction tube. Insert the suction tubes together to the desired length (42/78/114/150 cm).
- Insert the suction tube into the transparent nozzle (g).
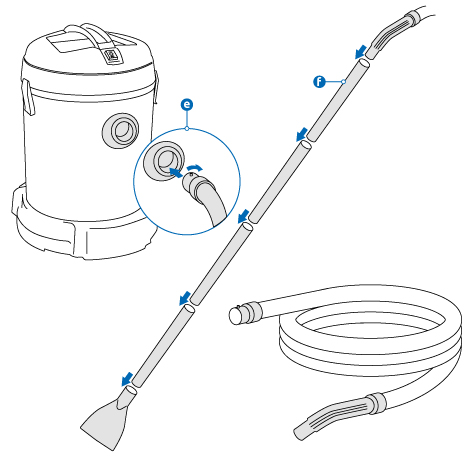
- Insert the suction hose (e), with the little catch pointing upwards, into the inlet of the container and turn it a quarter turn so that it locks in place.
- Insert the handle of the suction hose (f) into a suction tube. Insert the suction tubes together to the desired length (42/78/114/150 cm).
- Insert the suction tube into the transparent nozzle (g).
- Plug into the mains socket.
- You can now take the Pond Multi Vac into operation by pressing the tilt switch to position I.
- The Pond Multi Vac will now start vacuuming constantly.
NOTICE! Empty the container regularly.
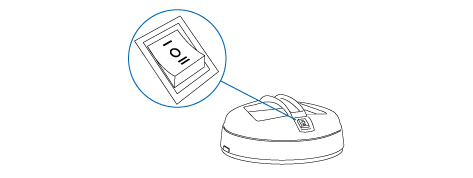
- Plug into the mains socket.
- You can now take the Pond Multi Vac into operation by pressing the tilt switch to position I.
- The Pond Multi Vac will now start vacuuming constantly.
NOTICE! Empty the container regularly.
Maintenance
NOTICE! The Pond Multi Vac must be cleaned regularly for trouble-free operation. Faults due to a dirty motor caused by improper or lack of maintenance are not covered by the warranty.

ALWAYS disconnect the mains plug before carrying out maintenance!
- Clean the housing regularly with a damp cloth (preferably after each use).
- For stubborn dirt, use a soft cloth moistened with warm soapy water. NEVER use solvents (benzene, alcohol, ammonia, etc.), these can damage the plastic parts.
- Loosen the clamps and remove the motor housing (b) from the container.
- Carefully remove the filter sponge (after pond cleaning) from the motor housing and rinse it clean.
- Let the filter sponge dry thoroughly before replacing it. Replace the filter sponge if it is damaged.
- Clean the underside of the motor housing and the float with a soft cloth, check for any damage and that the float is still working properly.
- You can rinse out the dirt collection bag with water.
- If the Pond Multi Vac has been used as a vacuum cleaner, remove the dust filter after use and shake it out to maintain vacuum power.
- The dust filter can be rinsed with water, let it dry well before replacing it. Replace the dust filter (Art. 06090030) if it is damaged.
- Empty the container and clean it on the inside with a (damp) cloth and/or rinse it with water. Make sure the container is dry before replacing the motor housing.
NOTICE! Always store the device in a dry place after use.